English
Views: 0 Author: Site Editor Publish Time: 2026-08-10 Origin: Site
A bad radiator cap can cause coolant overflow, pressure loss, overheating, coolant smell, collapsed hoses, air returning into the system, and repeated coolant loss even when the radiator itself is not cracked. The cap is small, but it controls cooling-system pressure and coolant recovery. If the pressure valve opens too early, coolant can boil or push into the overflow bottle. If the vacuum valve does not work, coolant may not return as the engine cools. If the seal is damaged, the system may never hold the pressure needed for stable heat transfer.
This article explains bad radiator cap symptoms, how the pressure and vacuum sides of the cap work, how to test the cap, and when the cap is not the main cause. It is written for repair shops, fleet technicians, distributors, and parts buyers who want to avoid replacing radiators, thermostats, or water pumps before checking a low-cost pressure-control part. For related cooling parts, Elecdura supports radiators, thermostats, cooling fan assemblies, and fan clutches.
The most common symptoms are coolant being pushed into the overflow bottle, coolant escaping near the cap, overheating under load, a sweet coolant smell after driving, visible crust around the filler neck, soft or collapsed upper radiator hose after cool-down, and a cooling system that cannot maintain pressure. A bad cap may also make the customer think the vehicle has a radiator leak because coolant disappears over several trips.
However, the same symptoms can come from other causes. A blown head gasket, restricted radiator, stuck thermostat, weak fan, wrong coolant level, leaking hose, or cracked expansion tank can also create pressure and overflow complaints. The radiator cap should be tested early because it is inexpensive and easy to inspect, but it should not be used as a guess that replaces proper diagnosis.
Symptom | Radiator Cap Link | Other Causes to Check |
|---|---|---|
Coolant overflow after driving | Pressure valve opens too early or seal leaks | Overheating, combustion gas, overfill, fan fault |
Hose collapses after cool-down | Vacuum valve fails to admit coolant/air return | Blocked overflow hose or recovery bottle issue |
Overheating at load | System cannot hold pressure, boiling point drops | Radiator restriction, thermostat, fan clutch, water pump |
Coolant smell near cap | Damaged cap seal or filler neck surface | Cracked tank, loose hose, reservoir leak |
Repeated coolant loss | Cap vents coolant too soon | External leak, internal leak, evaporator heater core leak |
A radiator cap is a pressure valve. As coolant heats up, it expands and system pressure rises. The cap holds pressure until a rated point, such as 13 psi, 15 psi, 16 psi, or another specification depending on the vehicle. Holding pressure raises the boiling point of the coolant mixture, helping the engine operate without localized boiling. When pressure exceeds the cap rating, the valve opens and allows coolant to move into the overflow or recovery bottle.
If the pressure spring is weak or the seal is damaged, the cap may open too early. The system then loses pressure and may boil sooner. A customer may see overflow even though the engine is not severely overheated. A weak cap can therefore imitate a more expensive cooling-system problem. This is why cap pressure testing is a sensible early step.
As the engine cools, coolant contracts and pressure drops. In a recovery-type system, the cap's vacuum valve allows coolant to be drawn back from the overflow bottle into the radiator. If this valve sticks closed or the return path is blocked, the radiator may not refill correctly. The overflow bottle may remain full while the radiator level drops, or the upper hose may collapse from vacuum.
This part of the cap is often overlooked because technicians focus on pressure rating only. A cap can hold pressure and still fail on the vacuum side. For vehicles with repeated low radiator level but coolant remaining in the recovery bottle, inspect the cap vacuum valve, overflow hose, hose clamps, and bottle pickup tube.
Cooling systems are designed to operate under pressure. When pressure is too low, coolant can boil at hot spots inside the engine before the temperature gauge shows an obvious fault. Steam pockets reduce heat transfer and may create sudden temperature spikes. A weak radiator cap can therefore cause overheating under load, climbing, towing, high ambient temperature, or long idle conditions.
The cap does not create cooling capacity by itself, but it allows the designed system pressure to exist. If the radiator, fan, thermostat, and pump are healthy but the cap cannot hold pressure, the vehicle may still run hot. Conversely, if the cap is good and pressure rises excessively, the root cause may be combustion gas, restriction, airflow failure, or overfill.
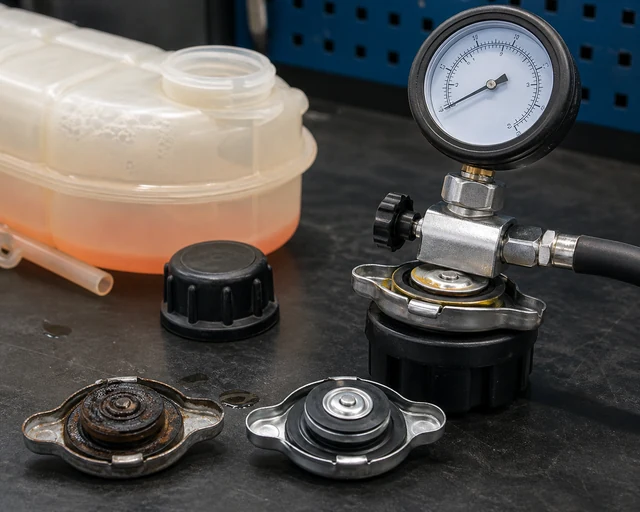
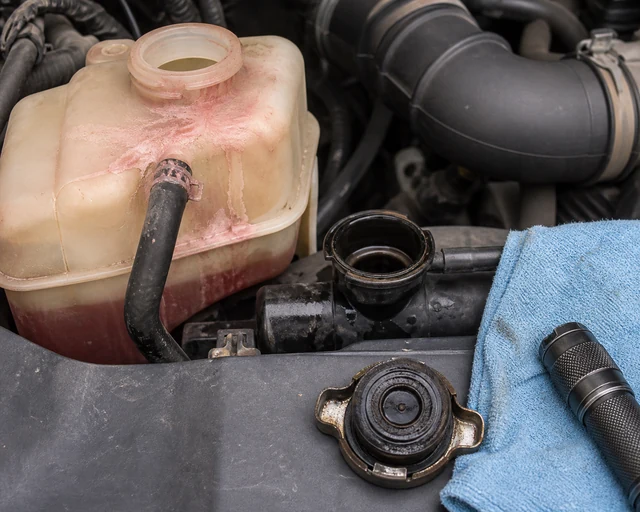
Never remove a radiator cap from a hot pressurized system. Wait until the engine is cool and use proper safety procedures. Inspect the rubber seals for cracks, hardening, swelling, cuts, or flattening. Look at the spring for corrosion or weakness. Check the metal body for rust or distortion. Inspect the filler neck where the cap seals; a new cap cannot seal properly against a damaged neck.
Also inspect the overflow hose and bottle. A blocked hose can make a good cap look bad because coolant cannot move correctly. A cracked recovery bottle, loose hose, or wrong coolant level can create similar symptoms. If the cap uses an expansion tank rather than a traditional radiator neck, inspect the tank threads and sealing surface as part of the cap diagnosis.
A radiator cap tester checks whether the cap holds its rated pressure and releases correctly. Install the cap on the tester adapter, pump pressure gradually, and watch the gauge. The cap should hold near its rated pressure and should not drop quickly. If it opens well below the rating or cannot hold pressure, replacement is justified. If it holds pressure correctly, continue checking the rest of the system.
Testing is especially useful for fleets and repair networks because it turns a guess into evidence. A cap that looks clean may fail under pressure, and a cap that looks old may still hold. The pressure rating must match the vehicle specification. Installing a cap with the wrong rating can create overflow, boiling, hose stress, or component damage.
Radiator caps are not universal. The pressure rating, neck depth, seal diameter, vacuum valve design, and cap style must match the vehicle. A cap that physically twists on may still be wrong. If the rating is too low, coolant may vent early. If the rating is too high, older hoses, tanks, or heater cores may be stressed beyond their intended operating pressure.
For distributors, cap matching should include OE reference, pressure rating, cap style, filler neck type, and application notes. Do not source only by diameter or appearance. In mixed aftermarket stock, similar caps should be labeled clearly because picking errors are easy and symptoms may not appear until the vehicle is hot.
The radiator cap may not be the main problem if coolant is pushed out aggressively soon after cold start, if bubbles appear continuously in the radiator, or if pressure builds rapidly before the engine is hot. Those signs may point toward combustion gas entering the cooling system. A block test, pressure test, or further engine diagnosis may be needed. Replacing the cap alone will not fix that condition.
The cap may also be innocent if the cooling fan does not run, the thermostat is stuck closed, the radiator is restricted, the water pump impeller is damaged, or the coolant mixture is wrong. In those cases, pressure may rise because the engine is truly overheating. The cap is then opening as designed. The correct diagnosis asks whether the cap caused pressure loss or whether it responded to excessive pressure from another fault.
Example one: a vehicle loses coolant into the overflow bottle on hot days. The fan works, the radiator is clean, and the cap tests far below its rated pressure. Replacing the cap restores pressure control and stops early overflow. This is a true cap fault.
Example two: a pickup has a collapsed upper hose every morning. The cap holds pressure but the vacuum valve is stuck, and the return hose from the overflow bottle is partially blocked. Replacing the cap and cleaning the return path solves the recovery problem.
Example three: a van pushes coolant out within minutes of cold start and has bubbles in the radiator neck. The cap is not the root cause. The cooling system needs combustion-gas testing and further engine diagnosis.
Confirm OE number and pressure rating.
Check cap style, neck depth, seal diameter, and expansion-tank compatibility.
Inspect pressure seal and vacuum valve design.
Request packaging that protects seals from deformation.
Label similar pressure ratings clearly in warehouse stock.
Ask for pressure-test evidence when evaluating supplier samples.
Record warranty claims with cap test result, coolant level, overflow behavior, and system pressure-test data.
A radiator cap claim should include the pressure rating, tester result, vehicle application, and symptom. If the complaint is simply "overheating," the cap may not be defective. Ask whether the cap was pressure-tested, whether the cooling fan operates, whether the thermostat opens, and whether combustion gas was ruled out when symptoms suggest it. This protects the supplier and helps the customer find the real fault.
If multiple caps from the same lot fail pressure testing, the issue may be spring calibration, seal material, or manufacturing consistency. In that case, a distributor should quarantine stock and review samples. If claims are scattered and not supported by pressure tests, the issue may be misdiagnosis or wrong pressure-rating selection. Good data turns warranty noise into useful product control.
Some vehicles use a traditional cap on the radiator neck. Others use a pressurized expansion tank cap. The function is similar, but the matching details are different. An expansion tank cap may use a threaded design, a different seal arrangement, and a pressure rating tied to the plastic tank. If the tank neck is cracked or distorted, a new cap may not seal correctly. For this reason, cap diagnosis on expansion-tank systems should include the tank itself.
Buyers should avoid treating radiator caps and expansion tank caps as one generic product group. The application data should state cap type, pressure rating, thread or twist design, seal diameter, and compatible tank or radiator neck. In warehouses, traditional caps and expansion tank caps should be separated clearly because a visual picking mistake can create pressure complaints that appear only after the vehicle heats up.
If the cap passes its own pressure test but the vehicle still loses coolant, pressure-test the cooling system. A system pressure tester can reveal leaks at hoses, radiator tanks, heater core connections, water pump seals, thermostat housing, and expansion tank seams. The cap may have been suspected because coolant appeared near the filler area, but pressure may be escaping elsewhere and collecting around the same region.
System pressure testing also helps distinguish external leaks from internal problems. If pressure drops and no external coolant appears, further diagnosis is required. Internal leakage into a cylinder, intake passage, or oil circuit can create serious engine issues. The radiator cap should be part of the pressure-control check, but it should not be asked to explain every coolant-loss complaint by itself.
Overfilling the recovery bottle or radiator can make a good cap appear bad. Coolant expands as it heats. If there is not enough expansion space, the system may push coolant out even though the cap opens at the correct pressure. Underfilling can also create air pockets that cause unstable temperature readings and poor heater performance. Always set coolant level according to the vehicle procedure before judging cap behavior.
Air bleeding matters as well. Some cooling systems trap air after radiator, thermostat, hose, or water pump work. Air pockets can expand, push coolant into the overflow bottle, and create overheating spikes. A new radiator cap cannot compensate for a poorly bled system. Shops should follow the correct bleed procedure and confirm heat output, fan operation, and stable temperature before returning the vehicle.
Radiator caps are inexpensive, but stocking the wrong range creates avoidable problems. Fleet workshops should keep caps by pressure rating and application group, not only by cap size. A medium-duty truck, passenger car, and European expansion tank may require very different pressure-control parts. If technicians choose from an unorganized bin, the wrong cap can be installed easily.
For distributors, a good radiator cap line should include clear labeling, stable pressure calibration, protected seals, and application data. The product may be small, but it supports the sale of larger cooling parts. When a customer buys a radiator, thermostat, or hose set, offering the correct cap can prevent repeat pressure loss and protect the larger repair. This makes radiator caps a useful add-on part when managed carefully.
A cap with too low a pressure rating can release coolant early. The vehicle may show overflow, low coolant, or overheating under load even though the radiator and fan are capable. A cap with too high a pressure rating can stress hoses, radiator tanks, heater cores, and plastic expansion tanks. On older vehicles, the higher pressure may expose weak points and create leaks.
This is why "it fits the neck" is not enough. The cap must match the designed pressure and physical sealing style. If a vehicle has been modified, repaired with an aftermarket radiator, or converted from one cooling layout to another, the buyer should verify the cap specification with the actual radiator or tank manufacturer. Inconsistent cap selection can turn a simple service item into a repeat overheating complaint.
When a distributor or supplier supports customers remotely, ask for photos before shipping another cap. Useful photos include the old cap top showing pressure rating, underside seal, radiator or expansion tank neck, overflow hose connection, recovery bottle level, and any dried coolant marks. These photos often reveal wrong cap style, damaged neck surfaces, or blocked return hoses.
For wholesale quality control, keep photos of supplier samples and approved packaging. If a later shipment has different seal design, spring height, printing, or packaging, compare it with the approved record. Small changes in a radiator cap can affect pressure behavior. A photo-based approval file gives the buyer a simple way to detect changes before claims rise.
When a shop recommends a radiator cap, the explanation should be practical: the cooling system needs pressure to raise the coolant boiling point and recover coolant after cool-down. If the cap cannot hold pressure or cannot return coolant from the bottle, the vehicle may lose coolant or overheat. This explanation is easier for customers to accept than simply saying the cap looks old.
At the same time, shops should avoid promising that a cap will fix every overheating complaint. If the vehicle has severe overheating, bubbling, fan failure, or a restricted radiator, the cap may be only one check in a larger diagnosis. Clear communication protects trust and reduces comebacks.
Bad radiator cap symptoms include coolant overflow, pressure loss, overheating, coolant smell near the cap, collapsed hoses, and poor coolant recovery. The cap should be inspected and pressure-tested early because it is inexpensive and can create expensive-looking symptoms. But it should not be blamed when the system is truly overheating from airflow, thermostat, radiator, water pump, or engine problems.
When ordering radiator caps or related cooling parts, confirm OE number, pressure rating, cap style, neck depth, seal design, and application. Elecdura can help buyers match radiator caps, radiators, thermostats, cooling fans, and other thermal parts so small pressure-control failures do not become repeated cooling-system repairs.