You are here:Home » Resources » Blog » Industry Insights » Plastic Radiator Repair or Replace? Cracks, Crimp Leaks, and Warranty Evidence
Plastic Radiator Repair or Replace? Cracks, Crimp Leaks, and Warranty Evidence
Views: 0 Author: Elecdura Publish Time: 2026-08-31 Origin: Site
A cracked plastic-aluminium radiator should usually be replaced when damage reaches a hose neck, mounting load path, tank-to-header crimp seam, heat-aged tank, distorted header or repeatedly pressurized area. A specialist repair may be reasonable for a serviceable radiator only after the leak location, material condition and root cause are verified. Never open or pressure-test a hot cooling system.
For wholesale replacement review, send Elecdura the vehicle/OE number, dry leak photographs, core and port details, cap/system test results, mount condition, lot label and quantity through the radiator supply programme.
Repair-or-replace decision table
Observed condition
Default decision
Why
Cracked hose neck or outlet
Replace
Hose clamp, handling and thermal loads act directly on the damaged feature
Crack at mounting boss or tank load path
Replace
Vehicle vibration and frame movement can reopen a cosmetic repair
Long/brittle crack in heat-aged tank
Replace
The visible crack may be one symptom of material-wide aging
Leak at tank-to-header crimp
Specialist assessment; often replace
Gasket, crimp load, header flatness or tank flange may be involved
Small accessible damage on otherwise sound serviceable design
Specialist repair may be possible
Only if material, structure and pressure integrity can be restored and tested
Core tube/fin or header damage
Repair specialist or replace
This is not a plastic-only repair and requires heat-exchanger expertise
Collision, fan contact, freeze or overpressure damage
Correct cause, then normally replace
A patch does not correct distorted structure or system abuse
Emergency seep far from loads
Temporary action only if safely approved
Plan prompt replacement and monitor; do not promise permanence
Leak location and load path matter more than the apparent length of the crack.
First identify exactly where coolant escapes
Coolant travels along tanks, fins, brackets and air guides, so the first wet spot seen in the vehicle may not be the source. With the system cold and depressurized, inspect the cap and filler neck, expansion/return hose, upper and lower hoses, clamps, drain, sensor or switch, transmission/oil cooler fittings, tank seam, core, water pump and nearby engine pipes. Dye or controlled pressure may help only when used under the vehicle or test-equipment procedure.
Clean the suspect area without erasing fracture or impact evidence, dry it and photograph a wide view plus close-ups. Mark the actual leak only after confirmation. Do not apply sealant before warranty evidence is collected; it can contaminate the circuit, hide the source and make laboratory inspection inconclusive.
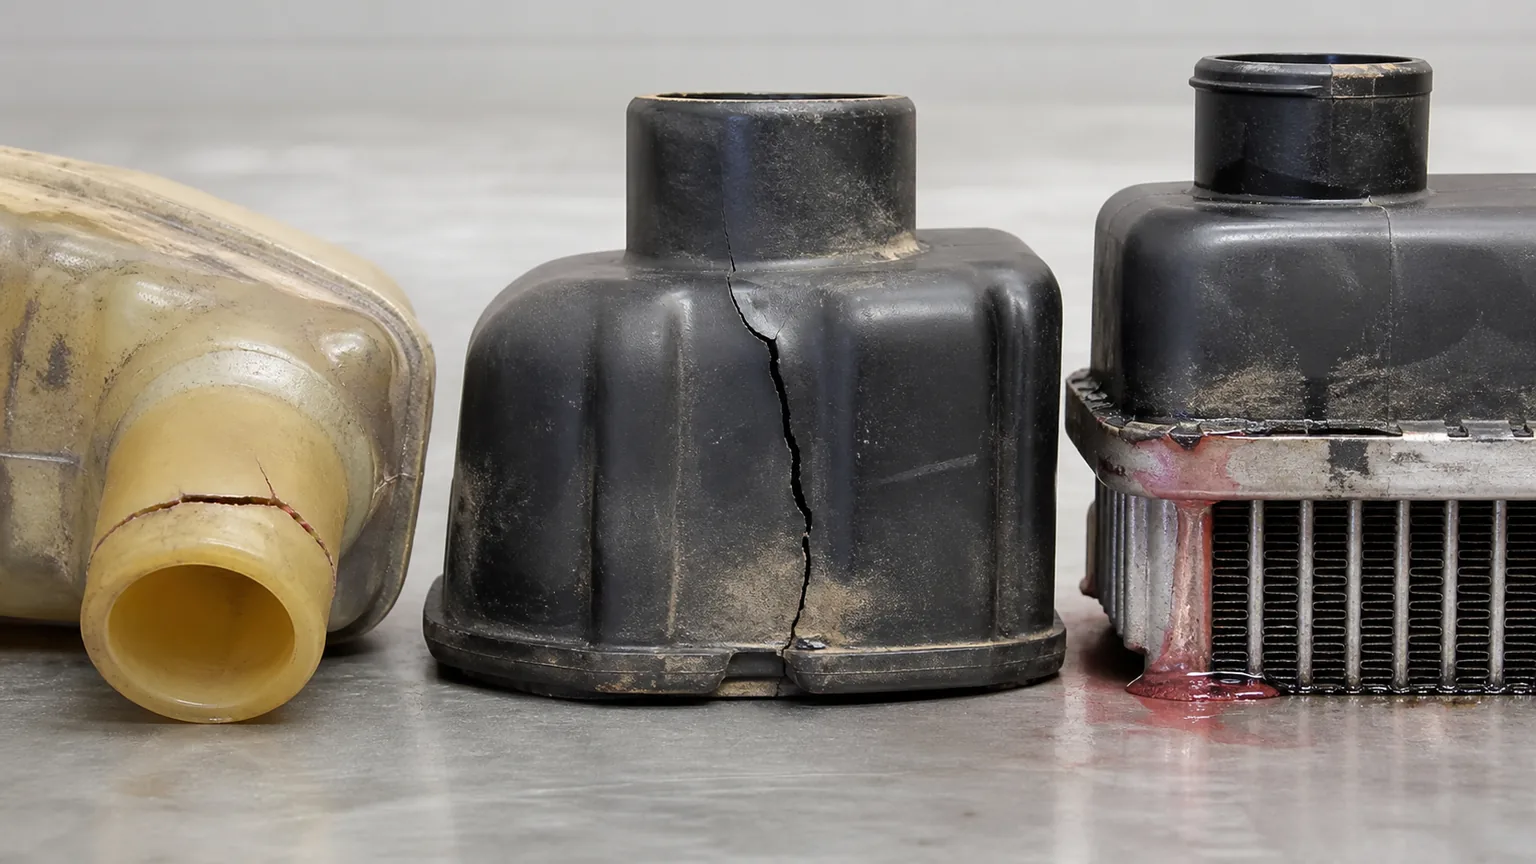
Neck, tank-body and crimp-seam leaks have different loads, causes and repair prospects.
Why plastic tanks age and crack
Radiator tanks are engineered polymers reinforced and shaped for temperature, pressure, coolant and mechanical duty. Over years of hot-cold cycling, the material can lose toughness. Oxygen, coolant chemistry, temperature peaks, UV or chemical exposure outside the tank, vibration and residual moulding or assembly stress can contribute. Aging is not uniform, and appearance alone cannot quantify remaining life.
A brown or discoloured tank is not an automatic failure verdict, but widespread brittleness, chalking, cracking around several features or a neck that crumbles under normal hose removal strongly argues against local patching. Repairing one point does not restore the rest of an aged tank.
Hose-neck cracks are high risk
The neck carries hose insertion/removal force, clamp load, coolant pressure, thermal expansion and hose movement. A crack at its base or through the bead is structurally important. An external adhesive may appear dry at idle but fail as temperature, pressure and engine movement repeat.
Also inspect hose hardness, swelling, incorrect diameter, clamp type and position, pipe alignment and engine movement. A short, misrouted or hardened hose can pull continuously on the new radiator. Support the hose during service and never use the radiator neck as a lever.
Crimp-seam leakage is not simply a plastic crack
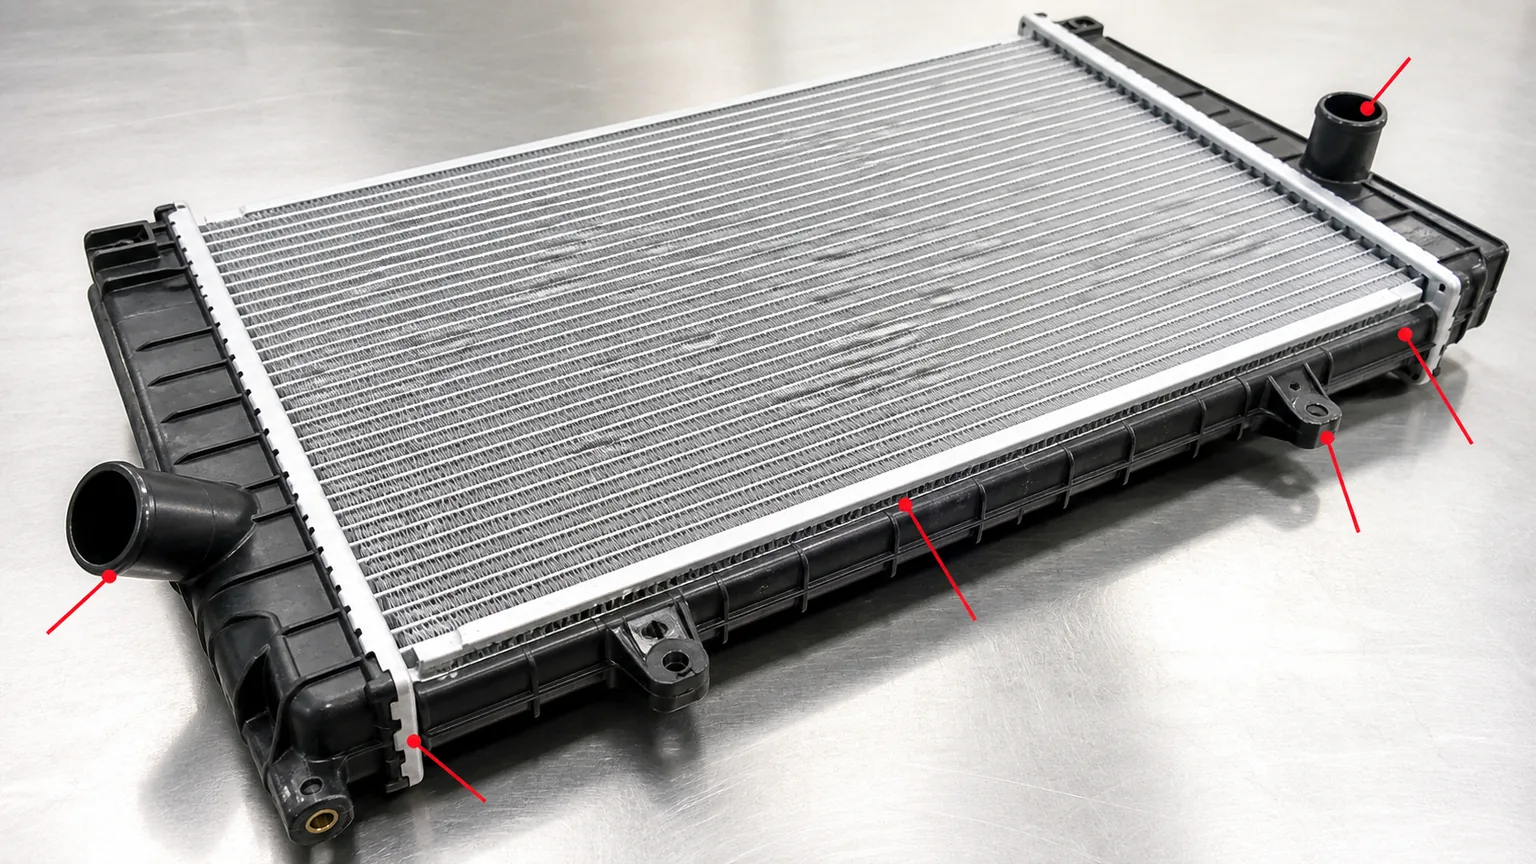
Plastic tanks are commonly sealed to an aluminium header by a gasket and formed crimp tabs. A seam leak can involve gasket compression or aging, uneven or relaxed tabs, a distorted header, cracked tank flange, contamination in the joint or pressure/thermal overload. Crimping one tab harder without measuring the assembly can create an uneven load or damage the header.
A specialist may sometimes replace a serviceable tank and gasket and recrimp the header using proper tooling and inspection. The decision depends on part design, available components, header flatness and core condition. It is not equivalent to squeezing tabs with general pliers in the vehicle.
What adhesives and stop-leak can—and cannot—do
An adhesive repair depends on compatible polymer, surface preparation, crack geometry, temperature, coolant exposure, pressure cycling and load. Many radiator-tank plastics are difficult to bond reliably, and the surrounding aged material may fail beside the patch. Therefore no adhesive should be presented as a universal permanent repair for a neck, seam, mount or structural tank crack.
Stop-leak products circulate through the cooling system rather than restoring the damaged structure. They may affect small passages, heater cores, seals or diagnostic evidence. Use only if the vehicle maker and product instructions allow it and understand whether it is an emergency measure. It should not replace root-cause diagnosis or a sound component.
Pressure testing: controlled, cold and documented
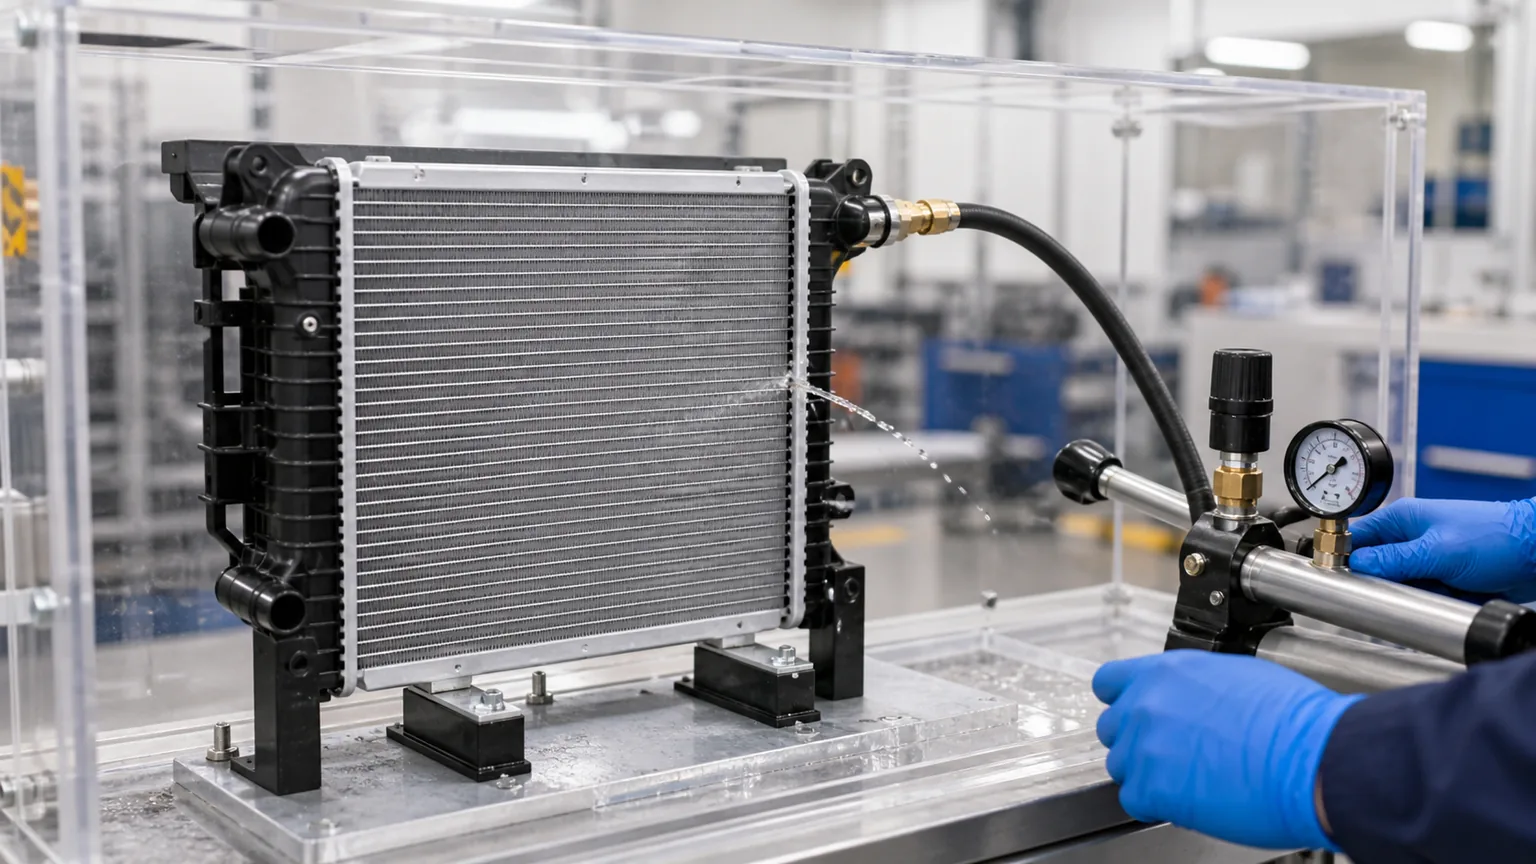
Use equipment intended for the cooling system and follow the vehicle/radiator procedure. The system must be cold, isolated from people and secured. Do not exceed the specified test pressure, use shop air directly or stand over a pressurized damaged neck. Pressure should be raised gradually while observing the unit and test connections.
Record tester identity/calibration, initial and final pressure, hold time, coolant or test medium, temperature, visible leak location and whether pressure loss can come from the tool or another component. Test the cap separately for pressure relief and vacuum return where applicable; Elecdura’s radiator-cap pressure test guide explains why cap behaviour matters.
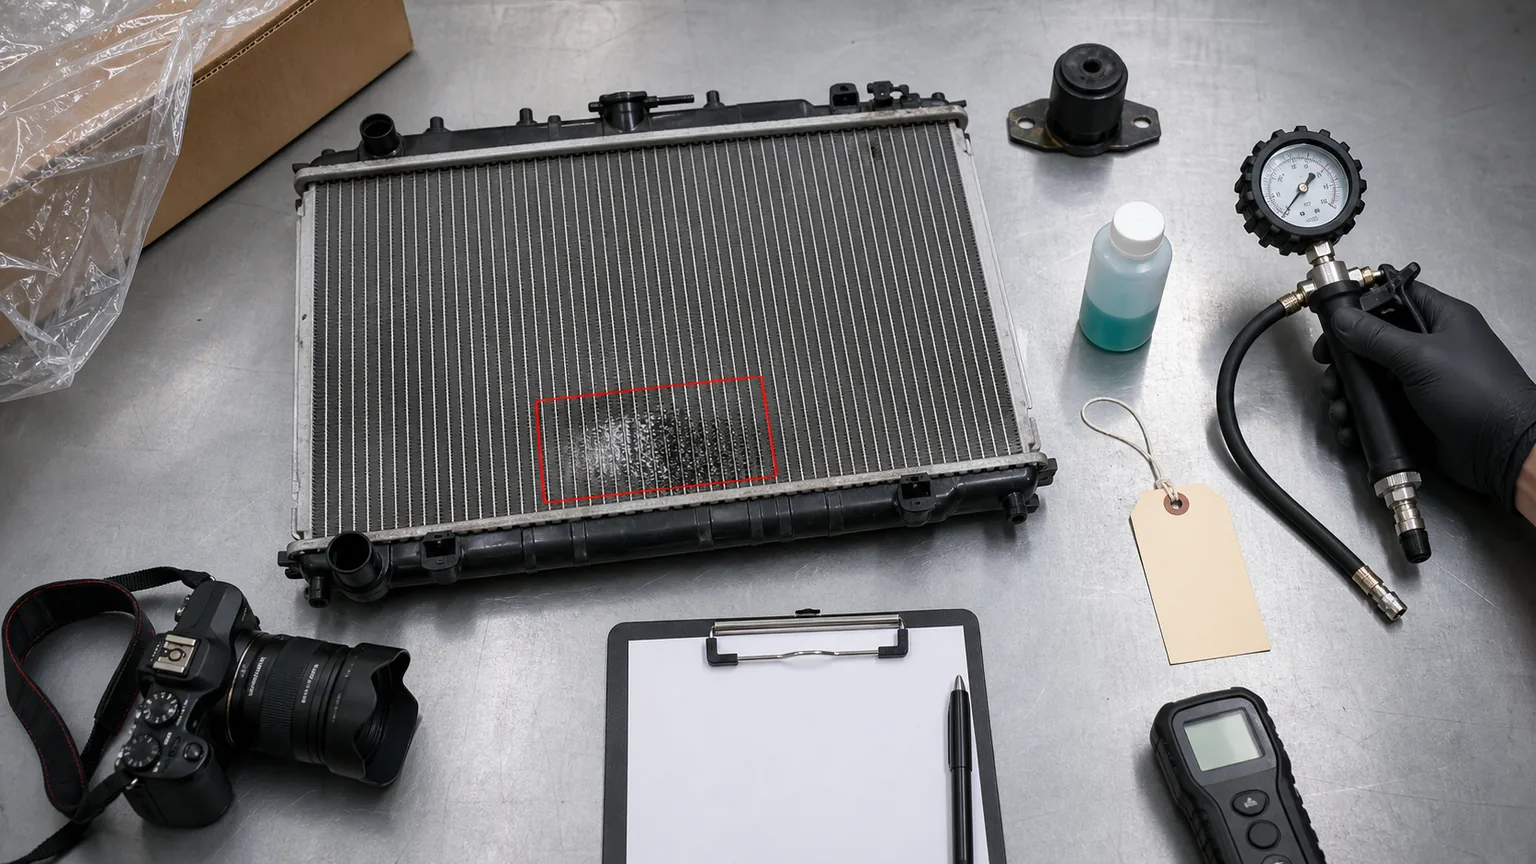
A regulated cold test should locate the leak without overstressing a weakened radiator.
Find the root cause before installing a replacement
Check cap specification and operation, thermostat, fan and shrouds, coolant level/concentration, trapped air, water-pump circulation, blocked external fins, internal restriction, combustion-gas intrusion, hose collapse, expansion tank and return circuit. A repeated overtemperature or overpressure condition can damage the new radiator.
Inspect mounts, rubber isolators, frame/crossmember alignment, fan clearance, engine mounts and adjacent condenser or charge-air cooler. Look for witness marks showing rub or impact. A radiator bolted into a distorted frame can carry continuous stress at tanks, headers and necks.
Evaluate coolant contamination, incorrect chemistry, mixed products, corrosion and electrical stray current under the relevant vehicle or radiator-supplier procedure. Do not use one universal voltage limit; test state, meter placement and supplier specification matter. Internal tube and fin construction also affects performance and durability, as described in Elecdura’s radiator core guide.
When a professional repair is reasonable
A repair can make sense for a rare or obsolete radiator, a serviceable copper-brass unit, an available replacement-tank design, or limited accessible damage where a qualified heat-exchanger specialist can restore structure and prove integrity. The repairer should identify the material and method, inspect the entire assembly, state exclusions and conduct a controlled leak/pressure test.
Compare remaining core/tank life, warranty, turnaround and total vehicle downtime with replacement. A repaired old radiator may still have reduced heat transfer from internal scale, external fin loss or previous overheating. Ask whether the repair includes cleaning and performance assessment, not just elimination of the visible drip.
Clear replacement criteria
cracked, deformed or previously patched hose neck;
crack at a mount, seam, flange, corner or structural transition;
multiple cracks, extensive brittleness or heat damage;
distorted header, widespread crimp leakage or unavailable correct tank/gasket;
core impact, severe corrosion, blocked passages or damaged integrated cooler;
fan or collision damage affecting alignment and strength;
repeated failure after a prior repair;
repair cannot be validated to the applicable pressure and service duty;
replacement offers lower total risk and downtime.
Read common leak patterns carefully
A hairline running outward from a moulded corner or boss often follows a local stress concentration. Look for a tight bracket, missing rubber sleeve, casting flash, previous impact or body movement. A circumferential neck crack can follow hose leverage, an overtightened or wrongly placed clamp, an unsupported hose, heat-aged material or a neck that was already damaged during earlier service. The pattern helps direct the investigation but does not prove one cause by itself.
A wet crimp line confined to one short area may relate to local gasket compression, header damage, debris or a distorted flange. Leakage along a long seam can reflect broader gasket aging, pressure overload, uneven crimp or structural distortion. Coolant appearing at the bottom of the tank may have run down from a top seam, vent, cap or hose. Dry the part and use absorbent witness material or approved dye/testing methods to locate the first emergence.
A tube-to-header leak is different from tank leakage. Inspect for white or coloured coolant residue, green/blue corrosion products where applicable, dark impact marks, flattened fins and tube swelling. Repeated pinholes can relate to corrosion, electrical current, coolant chemistry or material/process issues; a single crushed area may be road or handling damage. Cutting open the core without supplier authorization can destroy claim evidence, so coordinate destructive inspection.
Integrated transmission or oil coolers add another failure path. External coolant leakage does not prove the internal cooler is affected, but oil in coolant, coolant in oil or an unexplained fluid-level change demands immediate system isolation. Follow the vehicle and transmission maker’s contamination procedure. A repaired tank should not be allowed to distract from an internal cooler breach.
Evaluate a proposed repair like an engineered process
Ask the repairer to name the radiator construction, tank material and failure location; describe cleaning, preparation, joining or tank-replacement method; state whether the repair transfers load; and specify the cold pressure/leak test and warranty. A credible specialist will also inspect the rest of the tank, header, crimp, core, mounts and integrated cooler rather than treating the visible drip in isolation.
If plastic welding is proposed, material compatibility and control of heat, filler and joint geometry matter. A weld can be undermined by oxidized or embrittled surrounding plastic, contamination, inaccessible crack ends or residual mechanical stress. Drilling, grinding or heating can extend damage if performed without a validated method. The repaired zone must not interfere with the hose seal, cap seat, gasket flange, bracket or adjacent clearance.
If a replacement tank is available, inspect its moulding, necks, cap seat, flange and mounts against the original. The header must be flat and serviceable, and the correct gasket and controlled crimp process must be used. The completed radiator needs leak testing and dimensional inspection. A new tank on a corroded, blocked or impact-damaged core may still be a poor economic repair.
Define what “passed” means. A few minutes without a visible drip at low pressure is not a durability demonstration. At minimum, the applicable pressure-test procedure should be completed with no unsafe deformation or leakage, and the unit should fit without forced mounts or hoses. For high-value or repeat commercial repairs, add thermal cycling or a service trial and track the repaired unit by job number.
Distributor triage: quarantine before deciding credit
When a customer returns a radiator, protect people first: accept only a cooled, depressurized part, drain and cap it under the agreed environmental procedure, and place it in a labelled leak-safe area. Do not stack heavy parts on plastic tanks or throw away the carton. Assign a case number that connects the customer, vehicle, invoice, product number and lot.
Photograph the sealed or received package, every face of the radiator, labels, mounts, necks, seam and reported defect before cleaning. Record whether hoses, cap, sensors, drain plugs or fittings were returned and whether there is adhesive, stop-leak, collision damage or tool marking. Note coolant colour and obvious contamination without making an unsupported chemical conclusion.
Screen the application and product identity before testing. A wrong radiator can be forced into a vehicle and crack even when its label cross looked plausible. Compare VIN/build, OE number, dimensions, ports and mount geometry and establish whether the part was new, previously repaired or transferred from another vehicle. Check the install date, mileage/hours and whether the complaint occurred immediately or after service.
Only trained personnel should perform a controlled leak test. Record the method and keep “confirmed leak,” “no leak found,” “transit damage,” “incorrect application,” “installation damage,” “system-caused” and “manufacturing analysis required” as separate outcomes. A distributor can issue commercial goodwill without changing the technical finding, but those categories should not be mixed in quality data.
Cooling-system commissioning after repair or replacement
Before filling, verify all drains and fittings, hose routing, clamp position, cap/filler system, mounts, isolators, shrouds and fan clearance. Use the specified coolant mixture and avoid mixing chemistries unless the vehicle maker permits it. If the old coolant contained oil, combustion residue, corrosion debris or sealant, follow the approved flushing and component-inspection plan rather than contaminating the replacement.
Fill and bleed exactly as required; some systems need elevated fill points, vacuum filling, heater-valve commands or multiple heat/cool cycles. Trapped air can cause local boiling, unstable level, heater loss and misleading temperature behaviour. Watch for leaks without placing hands near a hot fan, belt or pressurized connection.
Record coolant level cold, warm-up behaviour, thermostat opening indication, fan engagement or command, heater output, upper/lower hose response where diagnostically appropriate, warning/fault status and stable temperature under a representative load. After complete cool-down, recheck level, joints, mounts and witness marks. A normal idle test in cool weather may not validate a vehicle that failed while towing, climbing, idling with A/C or working in dust.
Give the operator clear stop instructions for warning lights, steam, sudden heater loss, rising temperature or coolant smell. Do not encourage continued driving with an active leak. A modest radiator repair can become an engine or transmission loss when coolant level falls or an internal cooler contaminates another circuit.
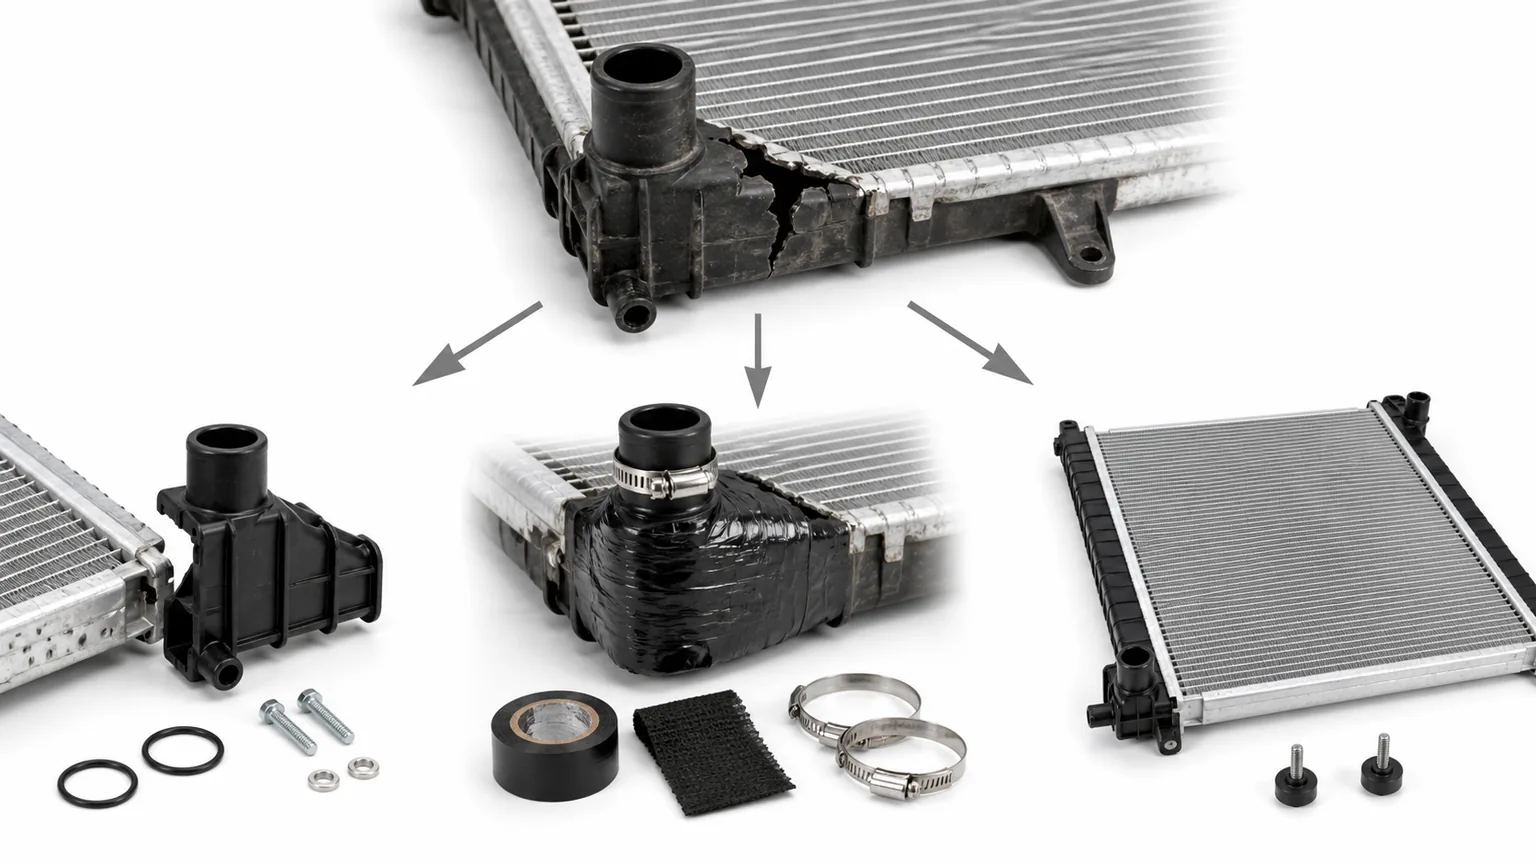
Structural location, material condition, root cause and proof testing drive the decision.
Install the replacement without recreating the failure
Compare OE number, core/overall dimensions, necks, cooler ports, mounts, cap system and adjacent-module interfaces before removing protective caps. Correct bent supports and replace damaged isolators, hoses and clamps. Do not force the radiator into the frame or pull misaligned hoses onto necks.
Use the specified coolant and fill/bleed procedure, keep oil and incompatible chemicals out, and verify cap and expansion return. Check for leaks and fan clearance cold and at operating temperature, confirm temperature recovery under a representative duty and reinspect after the first heat cycle and cool-down.
Warranty evidence that can be acted on
A useful claim preserves the original state. Record vehicle/VIN, engine and build, original and supplied part numbers, supplier lot/serial, installation date and distance or hours, coolant used, work performed and the full failure timeline. Photograph the part installed, mounts, hoses, cap, fan clearance, packaging and dry cleaned leak at wide and close scales.
Include system and cap pressure results, temperature/overheat history, coolant concentration and contamination, combustion-gas findings if tested, electrical ground/electrolysis procedure, impact/rub evidence and any earlier repairs. Keep the returned part with ports protected until written disposition. Elecdura’s cooling-parts traceability guide helps connect this evidence to lot control.
Complete vehicle, test, installation and traceability evidence makes a warranty decision reproducible.
Supplier quality checks for plastic-aluminium radiators
Buyers should audit polymer specification and moisture control, tank moulding, neck and flange dimensions, header flatness, gasket material, crimp height/uniformity, brazing, cleanliness, leak test, cap/port protection, traceability and packaging. A passing final leak test does not replace thermal-cycle, pressure-cycle, vibration and fit validation.
Track claims by failure location and evidence: tank body, neck, crimp seam, header/core, cooler port, mount, transit impact, installation force, vehicle overpressure and no fault found. Lot-linked patterns can justify containment; isolated system-caused failures should improve installation guidance rather than trigger an unsupported batch accusation.
Frequently asked questions
Can a cracked plastic radiator be permanently glued?
Not reliably in every case. Polymer, aging, crack location, loads and thermal/pressure cycling determine the result. Structural areas normally justify replacement.
Can I open the cap to check a leak?
Never open a hot or pressurized system. Allow it to cool and follow the vehicle maker’s safe procedure.
Does a crimp leak mean the tabs are loose?
Not necessarily. Gasket condition, tank flange, header flatness, crimp distribution and system pressure can all be involved.
Should I replace the cap with the radiator?
Inspect and test it and replace it when incorrect or faulty. Use only the specified rating and return/vacuum function.
What if the replacement cracks again?
Stop replacing parts blindly. Investigate overpressure, overheating, mounts, hose load, fan contact, coolant chemistry, grounds, combustion leakage and fitment.
Make the decision from evidence, not patch appearance
A small dry patch can hide a high-risk structural crack, while a serviceable specialist repair may be sensible on a rare unit. Leak location, material condition, full-system cause, repair method, proof test, downtime and warranty determine the defensible choice.
Send Elecdura the application, OE number, photographs, measurements, test findings, label and demand. We can assess replacement fit and build a traceable radiator supply plan.