English
Views: 0 Author: Site Editor Publish Time: 2026-07-29 Origin: Site
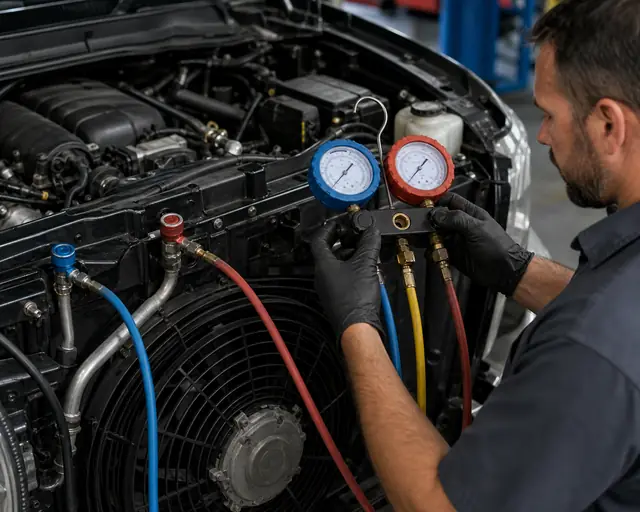
Quick diagnosis: high low-side pressure with low high-side pressure usually points toward weak compressor pumping or control problems. High low-side pressure with high high-side pressure points first toward overcharge, air in the system, poor condenser airflow, or heat rejection failure. High low-side pressure with unstable cycling can involve expansion valve behavior, charge error, sensor input, or compressor command. The low-side gauge only becomes useful when it is compared with high-side pressure, ambient temperature, vent temperature, condenser cooling fan operation, and service history.
For B2B buyers, the most important branch is condenser airflow versus compressor pumping. Condenser airflow problems usually show up with elevated high-side pressure because the condenser cannot reject heat. Compressor pumping weakness usually shows up when the compressor cannot create enough pressure difference. Expansion valve faults sit between those patterns and need temperature and contamination checks. Replacing the compressor, condenser, or expansion valve before reading both sides can waste parts and create warranty disputes.
Low-side pressure diagnosis should start with high-side pressure, condenser airflow, refrigerant charge, and expansion control before parts are ordered.
The low side of an automotive A/C system is the suction side of the compressor. Refrigerant leaves the evaporator and returns to the compressor through this side. Pressure on this side relates to evaporator temperature, compressor suction, refrigerant flow through the expansion device, cabin heat load, and system control strategy. A low-side number by itself does not diagnose the system. It must be read while the compressor is operating, the blower is set correctly, condenser airflow is present, and the system has stabilized.
Many technicians see a high low-side number and add refrigerant because the air is warm. That can make the problem worse. If the system is already overcharged, extra refrigerant raises pressure and compressor load. If the compressor is weak, added refrigerant does not restore pumping ability. If condenser airflow is poor, more refrigerant increases high-side pressure. If the expansion valve is stuck open, more refrigerant can flood the evaporator side and keep suction pressure high.
Before interpreting gauges, confirm the basics: ambient temperature, engine speed, blower speed, recirculation setting, doors open or closed according to test procedure, condenser fan operation, cabin filter condition, and whether the compressor is actually engaged or commanded. Static pressure with the system off is not the same as operating pressure. Pressures equalize when the compressor is off, so a high low-side reading with the compressor not running may simply mean the system is equalized.
Low-side pressure only becomes useful when it is compared with high-side pressure, fan operation, ambient temperature, and service history.
Gauge pattern | Likely direction | Checks before replacing parts |
|---|---|---|
Low side high, high side low | Weak compressor, control valve issue, slipping clutch, compressor not pumping | Confirm compressor engagement, command, clutch gap, control valve, oil/debris history |
Low side high, high side high | Overcharge, air in system, condenser airflow problem, condenser cooling fan issue | Recover and weigh charge, check condenser cooling fan, blocked fins, and airflow through the condenser face |
Low side high, high side normal | Expansion valve stuck open, compressor efficiency issue, heat load, sensor/control problem | Check vent temp, evaporator temp, valve bulb/contact, scan data, compressor command |
Both sides nearly equal while compressor is commanded on | Compressor not pumping, compressor not actually engaged, severe internal failure | Verify clutch or electric compressor operation before condemning compressor |
Pressures change rapidly or cycle oddly | Pressure switch, sensor, clutch cycling, low charge, restriction, control logic | Check scan data, pressure sensor, refrigerant charge by weight, and wiring |
A weak compressor may fail to create a strong pressure difference between the low and high sides. In that case, the low side remains too high because the compressor is not pulling refrigerant vapor down effectively. The high side may be low, normal, or slow to rise depending on failure mode. On clutch-type compressors, confirm the clutch plate is engaged and not slipping. On variable-displacement compressors, a control valve or command issue can make the compressor behave as if it is weak.
Do not condemn the compressor only because low side is high. Confirm refrigerant charge, condenser airflow, and expansion device behavior. If the system has black oil, metal debris, or a history of compressor seizure, compressor replacement may be part of a larger contamination repair. If the system is clean but pressure difference is poor, compressor efficiency or control may be suspect.
For replacement sourcing, confirm the compressor family, clutch or clutchless design, control valve, connector, pulley, oil type, refrigerant, and OE number. A compressor can physically bolt in and still be wrong for the system's control strategy, so this branch should be confirmed only after condenser airflow and charge conditions have been checked.
Too much refrigerant can raise both low-side and high-side pressure. It also increases compressor load and can reduce cooling. Air in the system can create abnormal high-side pressure because air does not condense like refrigerant. Both problems often come from charging by pressure only, using DIY cans without recovering and weighing the charge, poor evacuation, or adding refrigerant repeatedly without fixing a leak.
Pressure-only charging can hide overcharge; the charge should be weighed and compared with the system specification.
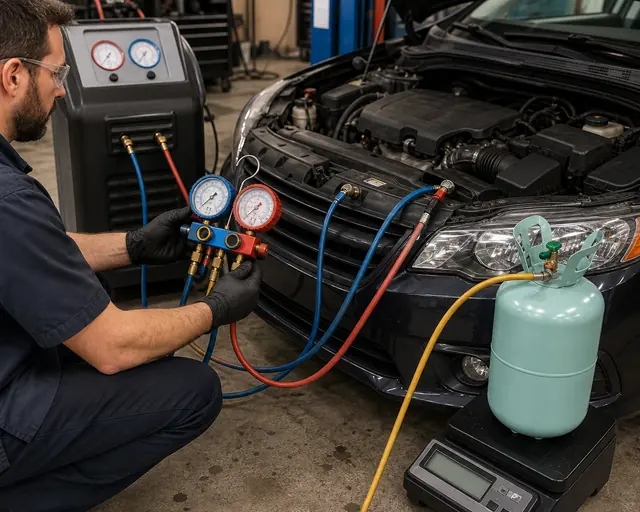
The correct check is to recover and weigh the refrigerant charge when the situation is unclear. Compare with the vehicle label or service specification. A system charged by pressure alone can be wrong because pressure changes with ambient temperature, airflow, engine speed, and humidity. After evacuation, the system should hold vacuum, then receive the specified refrigerant weight.
For distributors, overcharge-related failures often appear as compressor warranty claims. Ask whether the charge was weighed, whether the system was evacuated, and whether the correct refrigerant was used. A compressor damaged by overcharge or air contamination is not the same as a defective compressor.
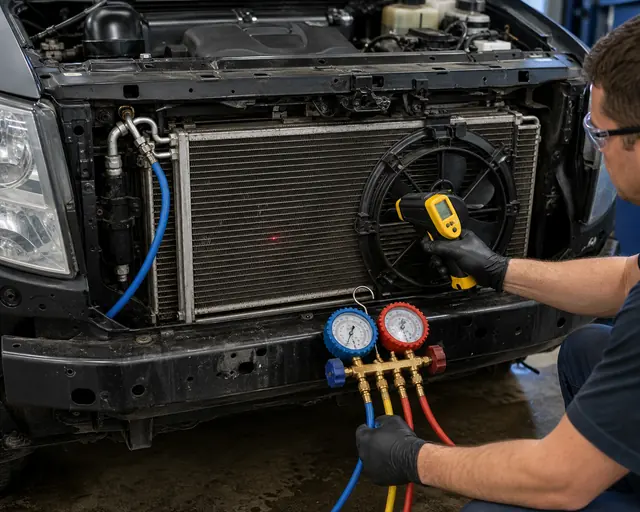
The condenser must reject heat. If airflow through the condenser is weak, high-side pressure rises. Depending on system behavior, low-side pressure can also stay high or cooling can become unstable. Causes include a failed condenser cooling fan, blocked condenser fins, debris on the condenser face, damaged airflow guides, wrong fan rotation, or an A/C pressure strategy that commands the condenser fan incorrectly.
High low-side pressure with high high-side pressure often needs an airflow and heat-rejection check before parts are ordered.
This is especially important when the complaint appears at idle but improves while driving. Vehicle speed can provide airflow that the fan cannot. If A/C cools on the highway but not in traffic, inspect condenser airflow before replacing the compressor. A compressor may be overloaded because the condenser cannot reject heat.
For sourcing, the AC condenser should be treated as the first replacement candidate when pressure data and airflow checks show heat rejection failure. A restricted or externally blocked condenser can produce pressure patterns that look like compressor or charge problems. For severe compressor failure, internal condenser debris can also become part of the repair decision because modern parallel-flow cores can trap contamination.
The expansion device controls refrigerant flow into the evaporator. If an expansion valve is stuck open, too much refrigerant may enter the evaporator and suction pressure can remain high. If it is restricted, low-side pressure often becomes low while high-side pressure rises, but real systems can behave differently depending on charge, temperature, and compressor control. An orifice tube can become contaminated with debris after compressor wear.
Check temperature drop, frost patterns, pressure response, and contamination evidence. If the expansion valve bulb is loose, incorrectly positioned, or affected by poor contact, valve control can be wrong. If debris is visible at the orifice tube, inspect for compressor wear and system contamination. Replacing only the expansion valve without addressing debris can lead to repeat failure.
In compressor replacement cases, the expansion device is often included in a kit because it is a common restriction and contamination point. For high low-side pressure diagnosis, treat the expansion device as a flow-control suspect after condenser airflow, charge weight, and compressor command are confirmed.
Oil and refrigerant mistakes can affect pressure readings. Too much oil can reduce heat transfer and cooling performance. Too little oil can damage the compressor. Wrong refrigerant or mixed refrigerants can create abnormal pressures. A system that was repaired after compressor failure may also contain leftover flush solvent, air, moisture, or debris if service was incomplete.
Oil is especially relevant after compressor replacement. A pre-filled compressor installed into a system that still contains most of its oil can overfill the system. A dry compressor installed without oil can fail quickly. Oil balance is a supporting check, but it should not distract from the main pressure pattern: condenser heat rejection, charge weight, expansion control, and compressor pumping.
Confirm the compressor is actually operating, not just the pulley spinning.
Record ambient temperature, vent temperature, low-side pressure, and high-side pressure.
Check condenser cooling fan operation with A/C on.
Inspect the condenser face for debris, bent fins, blocked airflow, and hot spots.
Recover and weigh refrigerant if charge amount is uncertain.
Check for air or moisture if evacuation history is poor.
Compare pressure pattern with compressor, expansion valve, and condenser airflow clues.
Inspect oil amount and service history after compressor replacement.
Check scan data for pressure sensor, compressor command, and fan request on modern systems.
Replace the part proven by the pressure pattern and supporting evidence.
High low-side pressure can lead customers to order the wrong part. Some need a condenser or condenser fan repair. Some need a compressor. Some need a drier or expansion valve. Some need a proper recovery, evacuation, and recharge. Before quoting parts, ask for the gauge pattern on both sides, ambient temperature, whether the compressor engages, whether condenser airflow is present, what parts were recently replaced, and whether the system was charged by weight.
Customer statement | Question to ask | Possible product direction |
|---|---|---|
Low side is high, A/C warm at idle | Does it cool while driving? Is the condenser cooling fan running? | Condenser airflow, condenser fan, condenser, compressor only after checks |
Low and high side almost equal | Is compressor engaged and commanded? | Compressor, clutch/control, pressure sensor, wiring |
Pressure high after recharge | Was charge weighed or added by can pressure? | Service correction before parts sale |
New compressor failed again | Was condenser/drier/expansion device replaced or flushed? | Compressor kit, condenser, contamination repair |
Pressure readings must be taken under controlled conditions. Ambient temperature changes both low and high side pressure. Engine speed changes compressor output. Blower speed changes evaporator heat load. Recirculation mode changes cabin load. A condenser cooling fan that is off during one test and on during another can completely change the result. Doors open, sun load, humidity, and airflow across the condenser all matter.
Before judging a high low-side reading, record the test condition. Was the engine idling or held at service RPM? Was the A/C set to max cold? Was the blower on high? Was the system stabilized for several minutes? Was the condenser cooling fan running? Was the vehicle recently driven or heat-soaked? Was the refrigerant charge known by weight? Without these details, two technicians can see different numbers on the same vehicle and reach opposite conclusions.
This is one reason many quick recharge decisions fail. A pressure gauge on a can does not show the full system. It may show a low-side reading that looks high, but it cannot explain high-side pressure, condenser heat rejection, compressor command, or charge weight. A proper manifold gauge set and service data create a better decision.
Older fixed-displacement compressors with a simple clutch are easier to interpret. The clutch is either engaged or not, and the compressor output is tied closely to speed. Modern variable-displacement compressors may change output internally. Some clutchless compressors are always driven mechanically but regulate displacement with a control valve. Electric compressors can change speed by control command. In these systems, high low-side pressure may not mean the same thing it meant on an older vehicle.
If the compressor is commanded to low output, suction pressure may stay higher than expected. If the control valve is stuck, the compressor may not pump enough even though the pulley is turning. If the pressure sensor reports wrong data, the ECU may reduce compressor operation to protect the system. If the evaporator temperature sensor approaches freeze protection logic, compressor output can change. A gauge reading must be compared with command data when available.
For buyers, this affects part matching. A compressor with the wrong control valve or connector may bolt in but fail to respond correctly. A generic compressor listing that ignores control type can create pressure complaints after installation. When sourcing replacement compressors, ask for OE number, control valve type, connector photo, pulley details, refrigerant, and oil specification.
A high low-side pressure complaint after compressor replacement has several possible explanations. The replacement compressor may be wrong for the application. The clutch may not engage fully. The control valve may not match the vehicle command. The system may be overcharged. The condenser may still contain debris from the old compressor. The oil amount may be wrong. The expansion device may be stuck open. The condenser cooling fan may not be running. The installer may have charged by pressure instead of specified weight.
This is why the repair record matters. A compressor claim should include old failure mode, system flush or condenser replacement decision, drier replacement, expansion device replacement, oil amount, refrigerant weight, vacuum record, and pressure readings. If none of those are documented, the supplier cannot know whether the compressor failed or whether the system was never restored correctly.
For severe old compressor failure, consider whether the new compressor was installed into a contaminated system. If the old unit had metal debris, black oil, or seized internally, pressure issues after replacement may indicate restriction or debris damage. In those cases, the repair should be connected with compressor kit and contamination logic, not treated as a simple pressure adjustment.
High low-side pressure can tempt a customer to buy the most expensive visible part: the compressor. Sometimes that is correct. But if the real cause is overcharge, airflow, or a stuck expansion valve, the compressor purchase does not fix the system. The opposite mistake also happens. A customer replaces a cheap pressure switch or expansion valve while the compressor cannot build pressure. The vehicle returns with the same warm air complaint.
A structured diagnosis protects cost. Recovering and weighing refrigerant costs less than replacing a compressor incorrectly. Cleaning condenser fins costs less than replacing an expansion valve. Measuring compressor command costs less than condemning a clutchless compressor by sight. Checking fan operation costs less than replacing a condenser that is simply not receiving airflow. The best content for this topic should make the reader slower to guess and faster to verify.
For wholesale businesses, that same logic protects reputation. A distributor who asks for pressure pattern, vehicle data, and service history may seem slower than one who simply quotes a compressor, but the result is better. The customer receives the part that matches the fault, not just the part named in the complaint.
High AC low-side pressure should be diagnosed with both gauges and the system condition. High low side with low high side often points toward compressor pumping weakness or control problems. High low side with high high side often points toward overcharge, air, condenser airflow, or heat rejection issues. High low side with normal or unstable high side requires closer inspection of expansion control, charge, compressor command, and oil history.
For repair shops, the goal is to avoid replacing parts by pressure alone. For importers and distributors, the goal is to ask enough questions before supplying the compressor, condenser, fan, drier, or expansion device. A correct diagnosis protects the compressor and prevents the same A/C complaint from returning after the first repair.